Supplies You will need to make the Paper Lanterns:
-Cardstock in Red, White and Blue
-A ruler
-Scissors
–Star punch or Star Stickers
-A pencil
-Glue Sticks
-Festive Ribbon
-Stapler
 Step One:
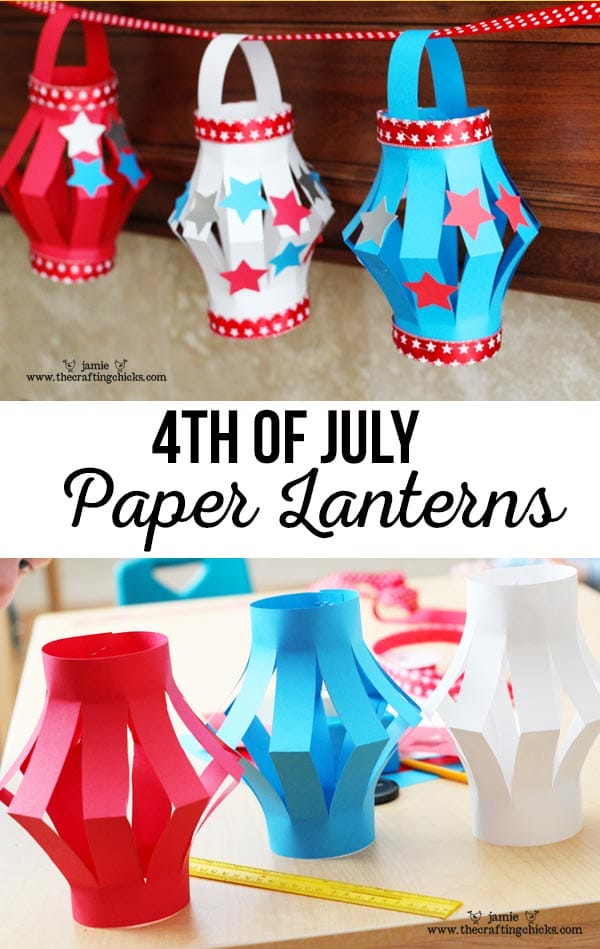
Fold your cardstock in Half Lengthwise. Then take
your ruler and draw lines from the fold, leaving an inch from the end of
your line and the edge. Leave about .75 inch on each side. Step 2: Have the kids cut on the line, stopping when the line ends, not through to the edge:) (This is great cutting practice)
*Little brother had to join…this photo is so funny because he has
been wearing that monster hat (we have a green and pink one) for days…he
refuses to take it off, even during nap time!
 Step 3:
Unfold your paper and then with the folded bumps on the outside, tun
inward and attach at the top and bottom. Then staple both the top and
bottom a couple of times.
Step 3:
Unfold your paper and then with the folded bumps on the outside, tun
inward and attach at the top and bottom. Then staple both the top and
bottom a couple of times. You
should now have a paper lantern to decorate! I was thinking you could
make these look Hawaiian by using bright colors and adding flowers, or
if you are throwing a birthday party you could easily match these
lanterns to your theme.
You
should now have a paper lantern to decorate! I was thinking you could
make these look Hawaiian by using bright colors and adding flowers, or
if you are throwing a birthday party you could easily match these
lanterns to your theme. We
added stars by using punched out star shapes in red, white, blue, and
silver. The kids just glued on the stars with glue sticks, but you could
even purchase some star stickers.
We
added stars by using punched out star shapes in red, white, blue, and
silver. The kids just glued on the stars with glue sticks, but you could
even purchase some star stickers.
We also added some festive ribbon on the top and bottom with a stapler and attached a 1 inch strip of cardstock for the handle.
And there you have it, a very easy kid’s craft for the summer…that you can even display in your home:)